JavaScript Intersection Observer API

在我们公司的产品中,发现了一个新上线的有意思的交互效果,原本我以为这种交互是借助了 positon: sticky 定位实现,但是细细观察后发现并不是,于是翻看源码研究了一下,并于此学到了一个新的有意思的 API: Intersection Observer。

先看一下产品的交互效果:当滚动条向下滚动时,在内容的标题即将消失的时候,模块框顶部的标题内容就换成了内容的标题。

先说一下实现思路吧:实现此交互的关键点就是在于怎么优雅的判断出内容的标题的可见性?解决了这个问题以后,接下来就是在内容的标题消失或者出现的节点,添加上相应的 css 过渡属性(transition)样式就可以了。

Intersection observer 概念和用法

Intersection Observer API 提供了一种异步观察目标元素与祖先元素或顶级文档视口交集中的变化的方法。

Intersection Observer API 允许您配置一个回调函数,在以下情况发生时调用该函数:

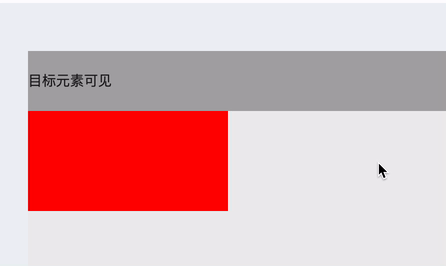
  • 每当目标 (target) 元素与设备视窗或者其他指定元素发生交集的时候执行。设备视窗或者其他元素我们称它为根元素或根 (root)。

  • Observer 第一次监听目标元素的时候

目标 (target) 元素与根 (root) 元素之间的交叉度是交叉比 (intersection ratio)。这是目标 (target) 元素相对于根 (root) 的交集百分比的表示,它的取值在 0.0 和 1.0 之间。

用法也是非常简单,分为以下步骤:

  1. 创建一个 intersection observer

创建一个 IntersectionObserver 对象,并传入相应参数和回调用函数,该回调函数将会在目标 (target) 元素和根 (root) 元素的交集大小超过阈值 (threshold) 规定的大小时候被执行。

1
2
3
4
5
6
7
let options = {
root: document.querySelector('#scrollArea'),
rootMargin: '0px',
threshold: 1.0
}

let observer = new IntersectionObserver(callback, options);

阈值为 1.0 意味着目标元素完全出现在 root 选项指定的元素中可见时,回调函数将会被执行。

  1. Intersection observer options

传递到 IntersectionObserver() 构造函数的 options 对象,允许您控制观察者的回调函数的被调用时的环境。它有以下字段:

info

指定根 (root) 元素,用于检查目标的可见性。必须是目标元素的父级元素。如果未指定或者为null,则默认为浏览器视窗。

rootMargin

根 (root) 元素的外边距。类似于 CSS 中的 margin 属性,比如 “10px 20px 30px 40px” (top、right、bottom、left)。如果有指定 root 参数,则 rootMargin 也可以使用百分比来取值。该属性值是用作 root 元素和 target 发生交集时候的计算交集的区域范围,使用该属性可以控制 root 元素每一边的收缩或者扩张。默认值为四个边距全是 0。

threshold

可以是单一的 number 也可以是 number 数组,target 元素和 root 元素相交程度达到该值的时候 IntersectionObserver 注册的回调函数将会被执行。如果你只是想要探测当 target 元素的在 root 元素中的可见性超过 50% 的时候,你可以指定该属性值为 0.5。如果你想要 target 元素在 root 元素的可见程度每多 25% 就执行一次回调,那么你可以指定一个数组 [0, 0.25, 0.5, 0.75, 1]。默认值是 0 (意味着只要有一个 target 像素出现在 root 元素中,回调函数将会被执行)。该值为 1.0 含义是当 target 完全出现在 root 元素中时候 回调才会被执行。

  1. Targeting an element to be observed

创建一个 observer 后需要给定一个目标元素进行观察。

1
2
let target = document.querySelector('#listItem');
observer.observe(target);

实战Demo

大概了解了该 API 的语法以后,尝试写一个简单的 demo 还原一下公司产品的那种交互效果。

html

1
2
3
4
5
6
7
8
9
10
11
12
13
14
<div class="container" [ngClass]="{'fixed': isFixed}">
<header>
<span class="title1">目标元素可见</span>
<span class="title2">目标元素消失啦</span>
</header>
<div #wraper class="wraper">
<div class="box" #box>

</div>
<div class="content">

</div>
</div>
</div>

scss

1
2
3
4
5
6
7
8
9
10
11
12
13
14
15
16
17
18
19
20
21
22
23
24
25
26
27
28
29
30
31
32
33
34
35
36
37
38
39
40
41
42
43
44
45
46
47
48
49
50
51
52
53
54
55
56
57
58
59
60
61
62
63
64
65
66
67
.container {
background-color: #fff;
display: flex;
flex-direction: column;
position: relative;

header {
height: 60px;
background-color: #aaa;
display: flex;
align-items: center;

.title1 {
visibility: visible;
opacity: 1;
margin-top: 0px;
transition: 400ms ease-out;
transition-property: margin-top, opacity;
position: inherit;
overflow: hidden;
}

.title2 {
position: absolute;
opacity: 0;
visibility: hidden;
margin-top: 32px;
transition: 400ms ease-out;
transition-property: margin-top, opacity;
}
}

.wraper {
height: 600px;
overflow: auto;
background-color: #eee;

.box {
width: 200px;
height: 100px;
background-color: red;
}

.content {
height: 1100px;
}
}

&.fixed {
header {
.title1 {
opacity: 0;
margin-top: -32px;
position: absolute;
pointer-events: none;
}

.title2 {
display: flex;
opacity: 1;
visibility: visible;
position: inherit;
margin-top: 0;
}
}
}
}

ts

1
2
3
4
5
6
7
8
9
10
11
12
13
14
15
16
17
18
19
20
21
22
23
24
@ViewChild('wraper', { read: ElementRef }) body!: ElementRef;

@ViewChild('box', { read: ElementRef }) box!: ElementRef;

isFixed: boolean = false;

ngAfterViewInit(): void {
const options = {
root: this.body.nativeElement,
rootMargin: '0px',
threshold: 0.2,
};
const observer = new IntersectionObserver(this.callback, options);
observer.observe(this.box.nativeElement);
}

callback = (data: IntersectionObserverEntry[]) => {
const intersectionRatio = data[0]?.intersectionRatio;
if (intersectionRatio < 0.2) {
this.isFixed = true;
} else {
this.isFixed = false;
}
};

完结撒花🎉,最后看一下效果:

总结

这里只是实现了个简单的交互效果,其实 Intersection observer API 的作用远不止于此,比如 还可以用来实现图片的懒加载、内容无限滚动等,感兴趣的可以去查看更详细的用法:MDN-Intersection Observer API

最后总结一下用到的知识点:

  1. Intersection observer API
  2. 利用 css 的 transition、transition-property 属性

本博客所有文章除特别声明外,均采用 CC BY-SA 4.0 协议 ,转载请注明出处!