在angular中的防抖主要是利用了rxjs中的debounce操作符,非常简洁方便!
下面主要是介绍其三种写法,主要分为两类,不封装指令的防抖和封装成指令的防抖,其中封装成指令的防抖又有两种写法:利用@HostListener装饰器和Renderer2.listen方法。
不封装指令的防抖
html
| <div class="syn-margin-24">
<p>
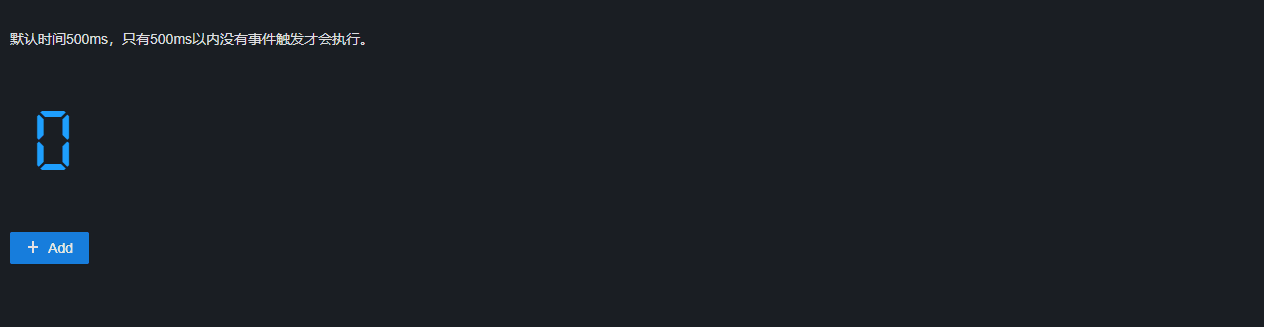
默认时间500ms,只有500ms以内没有事件触发才会执行。
</p>
<div class="syn-margin-24 label-font">
{{total}}
</div>
<button nz-button nzType="primary" (click)="add($event)">
<i nz-icon nzType="plus" nzTheme="outline"></i>
Add
</button>
</div>
|
ts
1
2
3
4
5
6
7
8
9
10
11
12
13
14
15
16
17
18
19
20
21
22
23
24
| import { debounceTime } from 'rxjs/operators';
import { Component,OnDestroy} from '@angular/core';
import { Subscription, Subject } from 'rxjs';
@Component({
selector: 'syn-debounce',
templateUrl: './debounce.component.html',
styleUrls: ['./debounce.component.scss']
})
export class DebounceComponent implements OnDestroy{
public total: number = 0;
public debounceTime: number = 500;
public subscription = new Subscription();
public subject$ = new Subject();
constructor() {
this.subscription = this.subject$.pipe(debounceTime(this.debounceTime)).subscribe(e => this.total+=1);
}
add($event: MouseEvent) {
this.subject$.next($event);
}
ngOnDestroy(): void {
this.subscription.unsubscribe();
}
}
|
效果图
定义了一个“主体”Subject,它既是观察者,也可以是订阅者,每次点击事件时调用add方法,然后使用next方法发送事件,然后由于subject$同时subscribe(订阅)了事件,所以会经过rxjs的debounce运算符的处理,其接收一个number类型的值,单位ms,就是我们设置的防抖时间。
指令-@HostListener
在实际的项目中用到防抖的地方肯定不只有一处,所以此时我们应该封装出一个防抖的指令使用,在ng中监听dom事件的方法我所了解的有两种:@HostListener监听和Renderer2.listen方法。思路都是一样的,都是利用了rxjs,只不过就是监听元素事件的写法不同而已。
ts
1
2
3
4
5
6
7
8
9
10
11
12
13
14
15
16
17
18
19
20
21
22
23
24
25
26
27
28
29
30
| import { Directive, EventEmitter, HostListener, Input, OnDestroy, OnInit, Output } from '@angular/core';
import { Subject, Subscription } from 'rxjs';
import { debounceTime } from 'rxjs/operators';
@Directive({
selector: '[synDebounceClick]'
})
export class DebounceClickDirective implements OnInit, OnDestroy {
@Input() debounceTime = 500;
@Output('synDebounceClick') debounceClick = new EventEmitter();
private subject$ = new Subject();
private subscription!: Subscription;
constructor() { }
ngOnInit(): void {
this.subscription = this.subject$.pipe(
debounceTime(this.debounceTime)
).subscribe(e => this.debounceClick.emit(e))
}
ngOnDestroy() {
this.subscription.unsubscribe();
}
@HostListener('click',['$event'])
clickEvent(event: any) {
event.preventDefault();
event.stopPropagation();
this.subject$.next(event);
}
}
|
导入相应的module后然后在HTML模板中使用即可
1
| <button nz-button nzType="primary" (synDebounceClick)="add()">Primary Button</button>
|
指令-Renderer2.listen
1
2
3
4
5
6
7
8
9
10
11
12
13
14
15
16
17
18
19
20
21
22
23
24
25
26
27
28
29
| import { debounceTime } from 'rxjs/operators';
import { Subject, Subscription } from 'rxjs';
import { Directive, ElementRef, Renderer2, OnInit, Input, Output, EventEmitter, OnDestroy } from '@angular/core';
@Directive({
selector: '[synDebounceRendererClick]'
})
export class DebounceRendererDirective implements OnInit, OnDestroy {
private subject$ = new Subject();
private subscription!: Subscription;
@Input() debounceTime: number = 500;
@Output('synDebounceRendererClick') synDebounceRendererClick = new EventEmitter();
constructor(private _elementRef: ElementRef, private _renderer2: Renderer2) {
this.subscription = this.subject$.pipe(debounceTime(this.debounceTime))
.subscribe(e => this.synDebounceRendererClick.emit());
}
ngOnInit(): void {
this._renderer2.listen(this._elementRef.nativeElement,'click',(e) => {
e.stopPropagation();
e.preventDefault();
this.subject$.next(e);
});
}
ngOnDestroy(): void {
this.subscription.unsubscribe();
}
}
|
html
1
| <button nz-button nzType="primary" (synDebounceRendererClick)="add()">Primary Button</button>
|
以上就是我所知道的三种写法,至于@HostListener和Renderer2.listen()有什么区别我也不是很清楚多方查阅也没有得到具体的结果,我所了解的是@HostListener只能监听宿主元素,而Renderer2.listen()可以监听任意元素,如果还有其它不同请在评论区留言交流!
笔者水平有限,若有错误敬请指正,不明白的地方欢迎评论区留言交流~